
Quickstart: your first agent
Build a Sequential Agent with one input and one task, run it, and read its record. About ten minutes.
This walkthrough builds the smallest useful thing in Turtle AI Coworker: a Sequential Agent that takes one input, does one task and returns a recorded result. As an example we build aMeeting Notes Summarizer that turns raw notes into a short summary with action items. The same editor is used for every agent you will build later.
If you would rather not start from a blank page, install a Solution Pack or ask the Assistant to set something up for you.
Step by step
Open Agents and click Create New
In the left navigation, under Build, click Agents. Check the workspace picker at the top of the page shows the workspace you want, then clickCreate New. (Import from Library is the other way in: it copies a ready-made agent template into the workspace.)
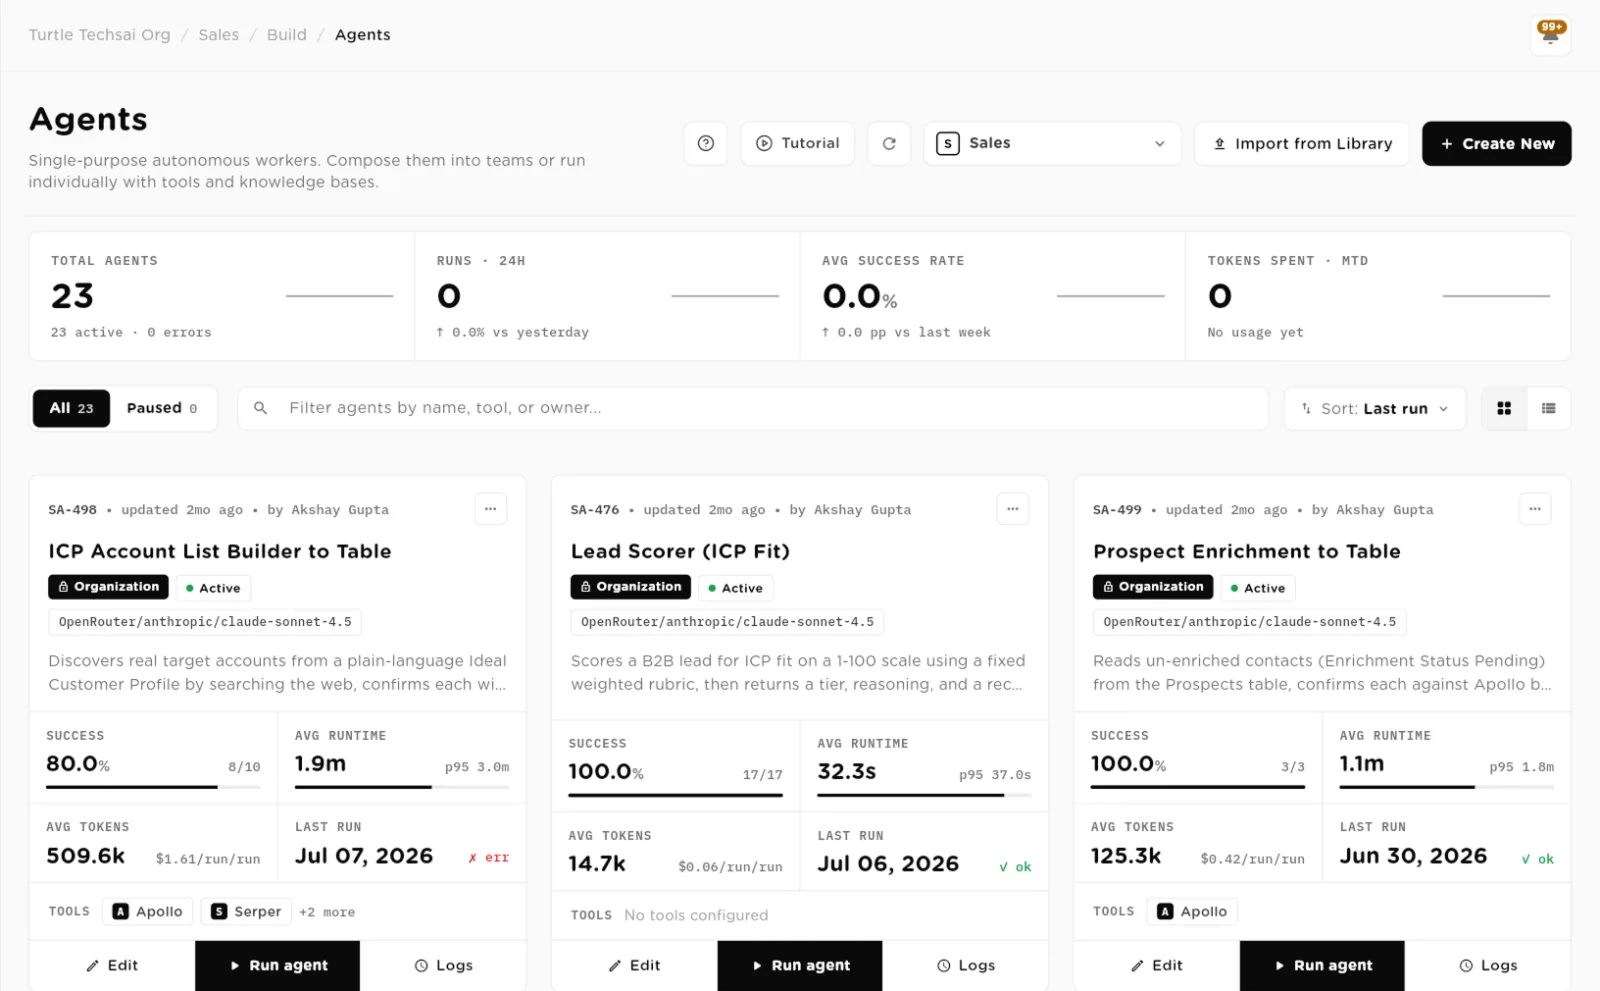
The Agents page. Create New opens an empty agent in the editor.click to enlarge Fill in Identity and Behavior
The editor opens on Basic Settings. Under Identity, type aName, for example
Meeting Notes Summarizer, and a shortDescription. The description is shown on the agent card and in search, and it is how teams and AI employees know when to use this agent. Under Behavior, add anAgent Role (one line, for exampleChief of staff who writes crisp summaries) and the Agent Instructions, the rules every task follows. For example: write in plain English, never invent a decision that is not in the notes, list each action item with an owner.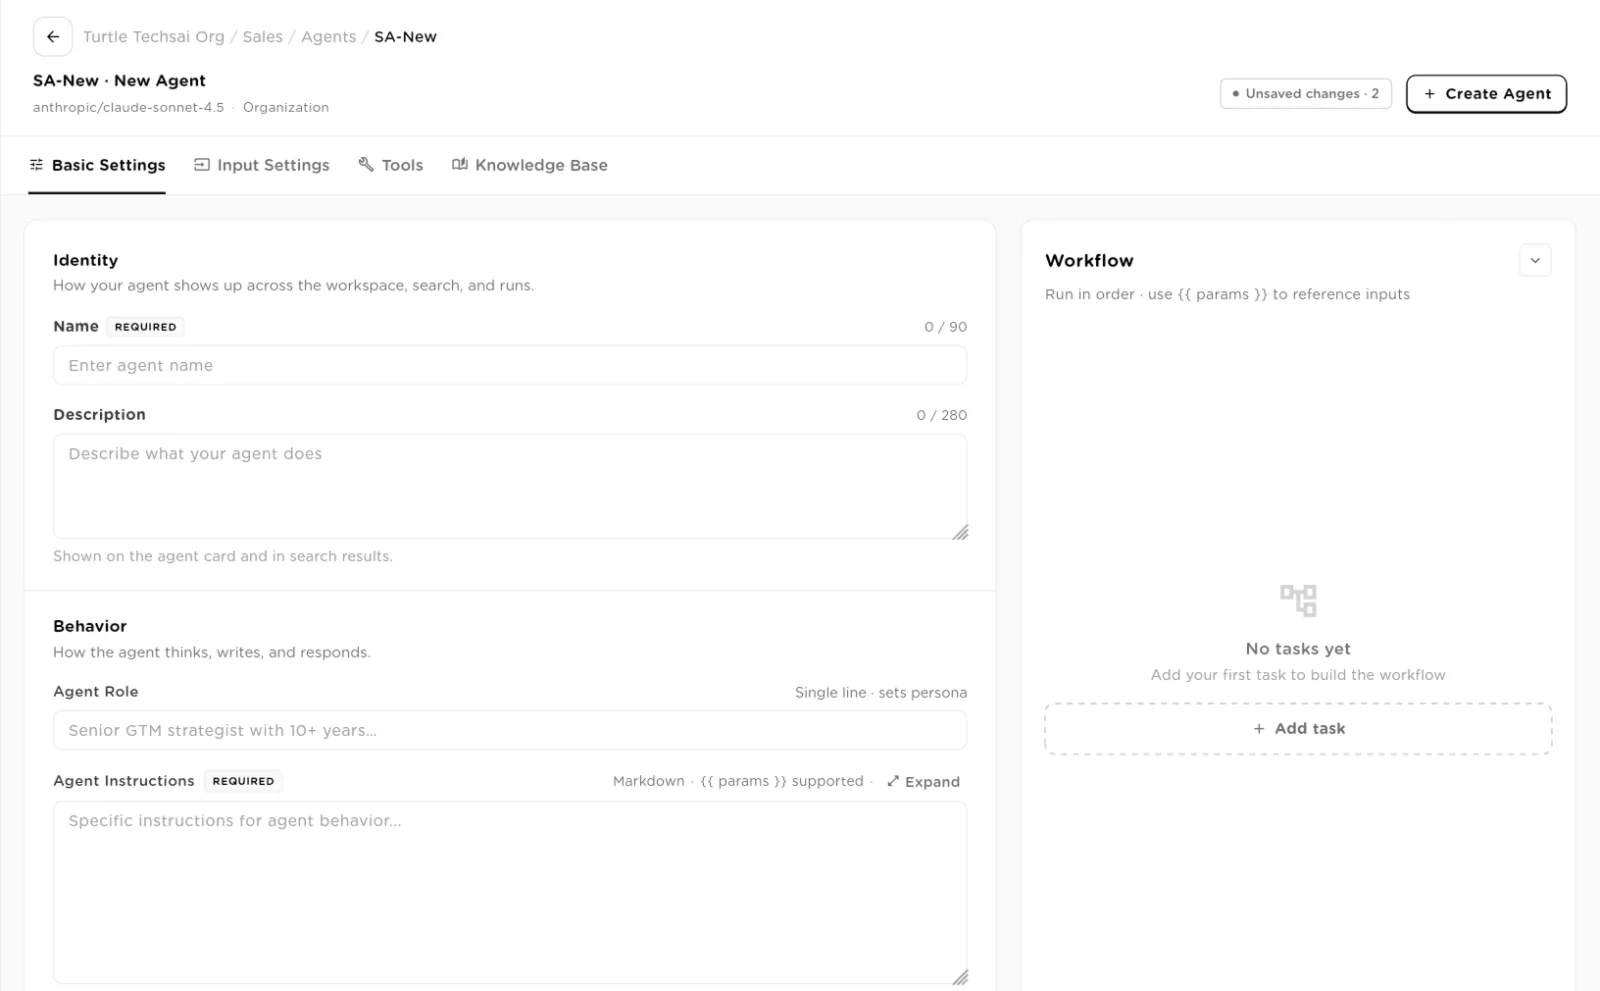
Basic Settings: Name and Instructions are required. The Workflow panel on the right is empty until you add a task.click to enlarge Choose the model
Scroll down to Model Configuration. Pick the LLM Provider and theLLM Model from the ones your organization has connected. Set theTemperature: the slider goes from 0 (deterministic) to 2 (creative). For a summary, a low value such as 0.2 gives steadier results.
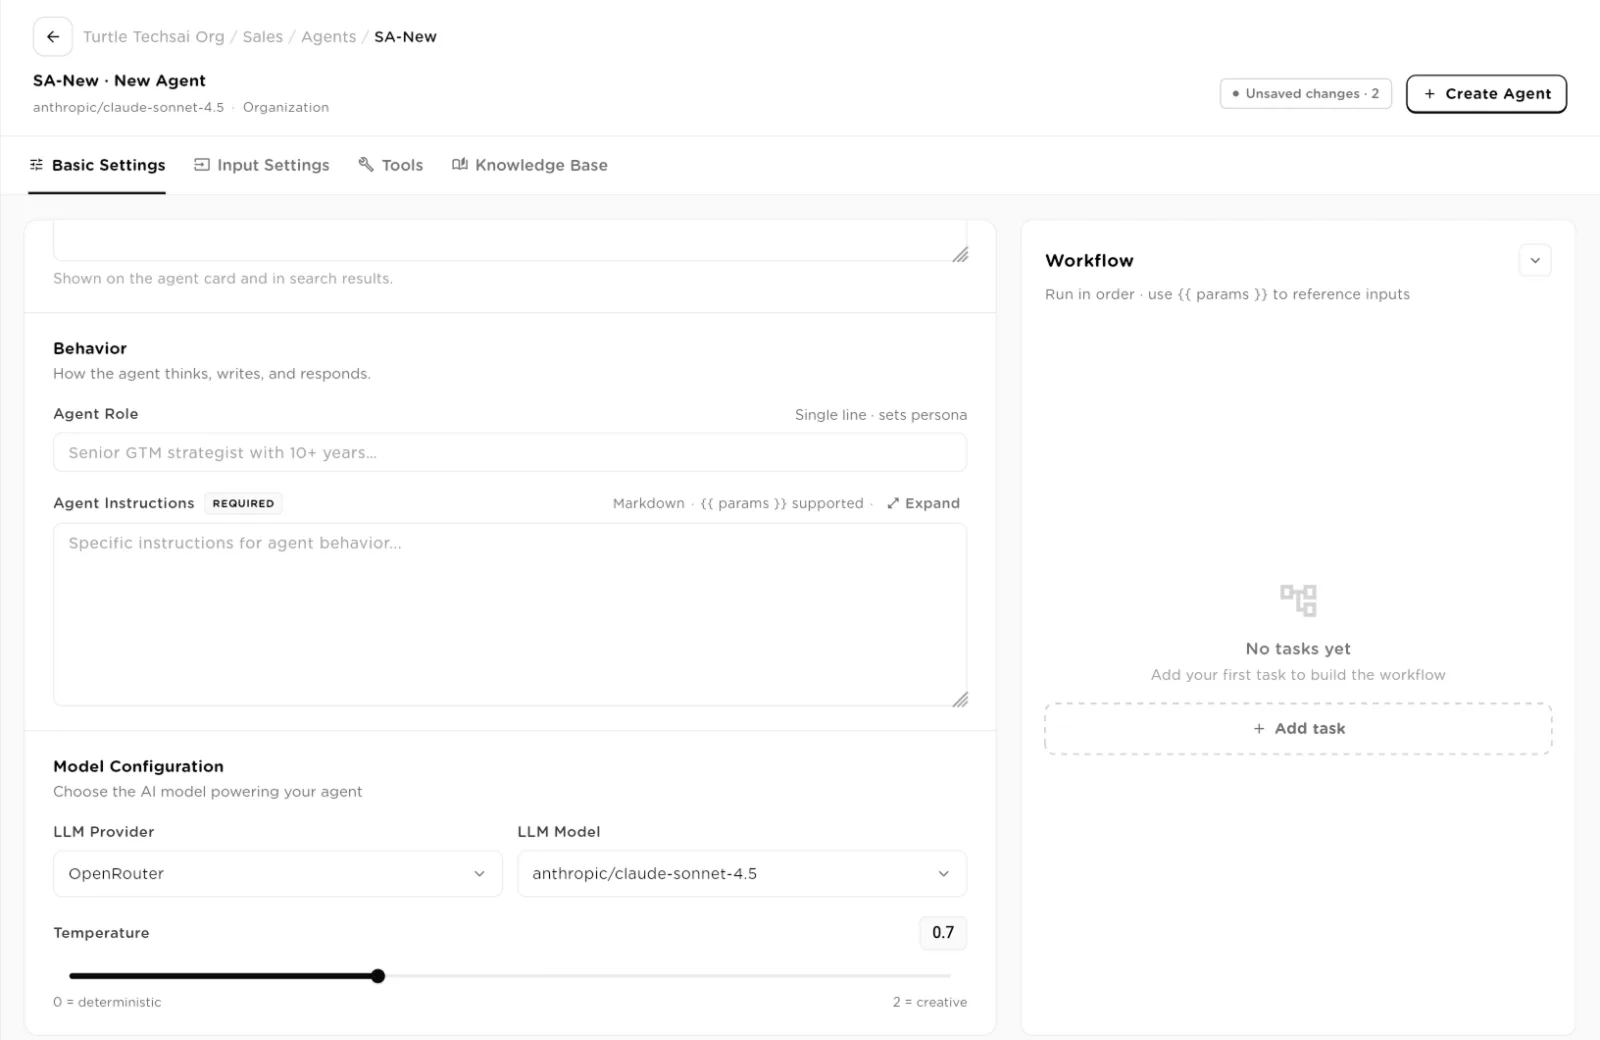
Model Configuration: the provider, the model and the temperature for this agent.click to enlarge Add an input
Open the Input Settings tab and click Add Input. InAdd New Input, set the Name to
Meeting Notes, theKey tomeetingNotes, the Type to Long Text, tickRequired field, and click Add. The key is how tasks refer to the value.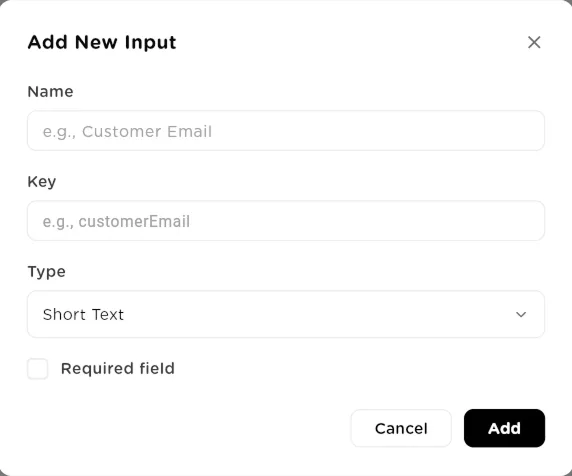
Add New Input: a name people read, a key tasks use, a type and whether it is required.click to enlarge Write the task
In the Workflow panel on the right, click Add task. Give the task a title. In Description, write the instruction and reference the input with its key in double braces, for example: Summarize
{{meetingNotes}}in five bullet points, then list every action item with its owner and due date. In Expected Output, describe the shape of a good answer in plain text, for example: a heading Summary with five bullets, then a heading Action items with one line per item. Click Save task.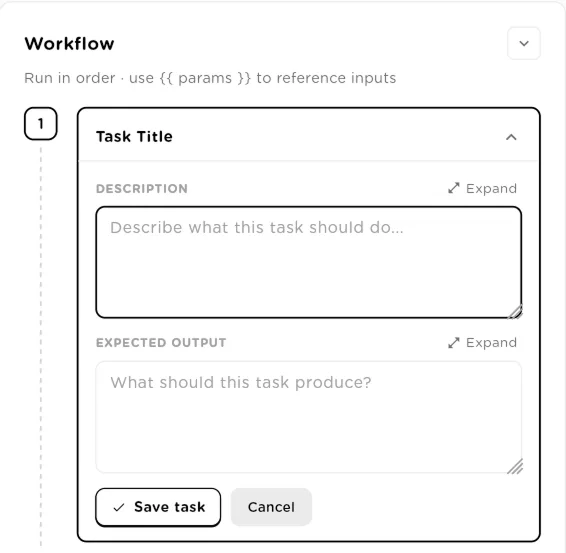
A task: the instruction in Description, the shape of the answer in Expected Output.click to enlarge Save the agent
Click Create Agent at the top right. The Unsaved changes badge next to it counts what has not been saved yet. Once the agent exists, the editor shows more tabs (Tables, Triggers, Statistics,Advanced) and a header with Run agent, History andSave changes. From now on, use Save changes after an edit.
Run it
Click Run agent. A drawer opens with the model, average runtime and cost, and one field per input. Paste some meeting notes into the input and click Run Agent. You can also run any agent from the Run page in the left navigation, which lists everything you can run in the workspace.
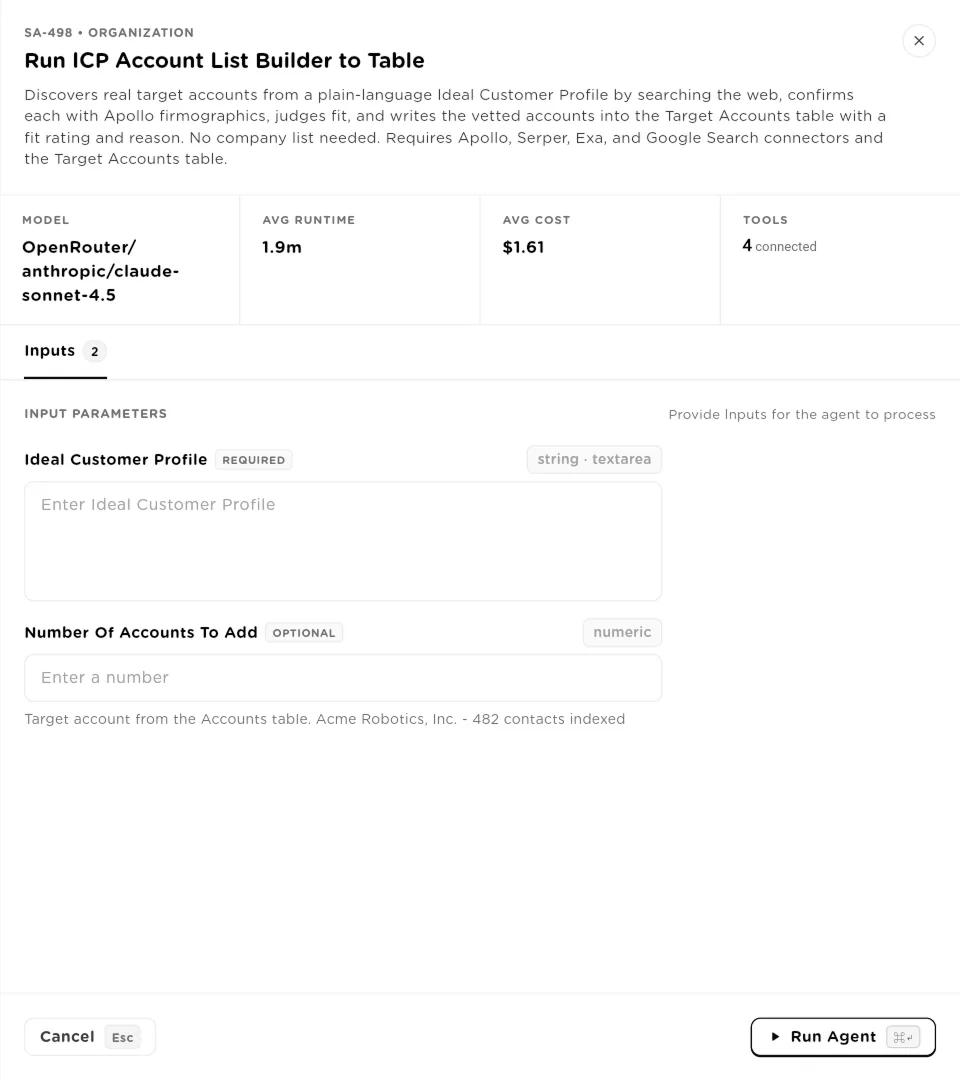
The Run drawer: fill in the inputs and click Run Agent. Required inputs are marked.click to enlarge Read the result and the record
When the run finishes, open History on the agent, or Logs on its card, to see the run. Each run records the inputs, the output of every task, every tool call, the duration and the cost. On the Run page, Recent runs lists runs too; click one to open its trace. If the result is not what you wanted, change the instructions or the task, click Save changes and run again.
Field reference
The fields you used in this quickstart. The full list is on the Sequential Agents page.
| Field | Type | What it does |
|---|---|---|
Name | text, required | How the agent shows up across the workspace, search and runs. Up to 90 characters. |
Description | text | Shown on the agent card and in search results. Up to 280 characters. |
Agent Role | one line | Sets the agent's persona. |
Agent Instructions | text, required | The rules every task follows. Markdown and {{ params }} are supported. |
LLM Provider / LLM Model | select | The provider and model this agent reasons with, from the ones your organization has connected. |
Temperature | 0 to 2 | 0 is deterministic, 2 is creative. Keep it low for repeatable results. |
Input: Name, Key, Type | input | A value the caller supplies at run time. Tasks reference it as {{ key }}. Tick Required field to refuse runs without it. |
Task: Description | text | The instruction for this step. Can use inputs and earlier task outputs. |
Task: Expected Output | text | What this step should produce, described in plain text. |
Related
- Sequential Agents: tools, knowledge bases, tables, triggers and sharing.
- Tables: give your agent a place to write results that last.
- Build vs install a pack
- The Assistant
- Core concepts & glossary