
Groups & access
Bundle people into groups, then give the whole group access to agents, teams, AI employees, tables and knowledge bases in one step, with a clear permission on each.
A group is a named set of people in your organization, such as Finance, Founders Office or Support Leads. Instead of sharing each agent or table with each person one by one, you share it with the group once. Everyone in the group gets that access, and anyone you add to the group later gets it too.
Use groups when the same people need the same tools: a department that runs the same agents, a team that works from the same tables, or a small circle that may read a sensitive knowledge base. Groups sit on top of roles: a person's role still decides what they can do at all, and a group adds access to specific resources.
How group access works
Step by step
Open the Groups page
Click Groups under Organization in the sidebar. The strip at the top showsTotal groups, Total members and Assigned resources. Each group is a card showing its members, its resources and a Manage button. UseSearch groups to find one by name.
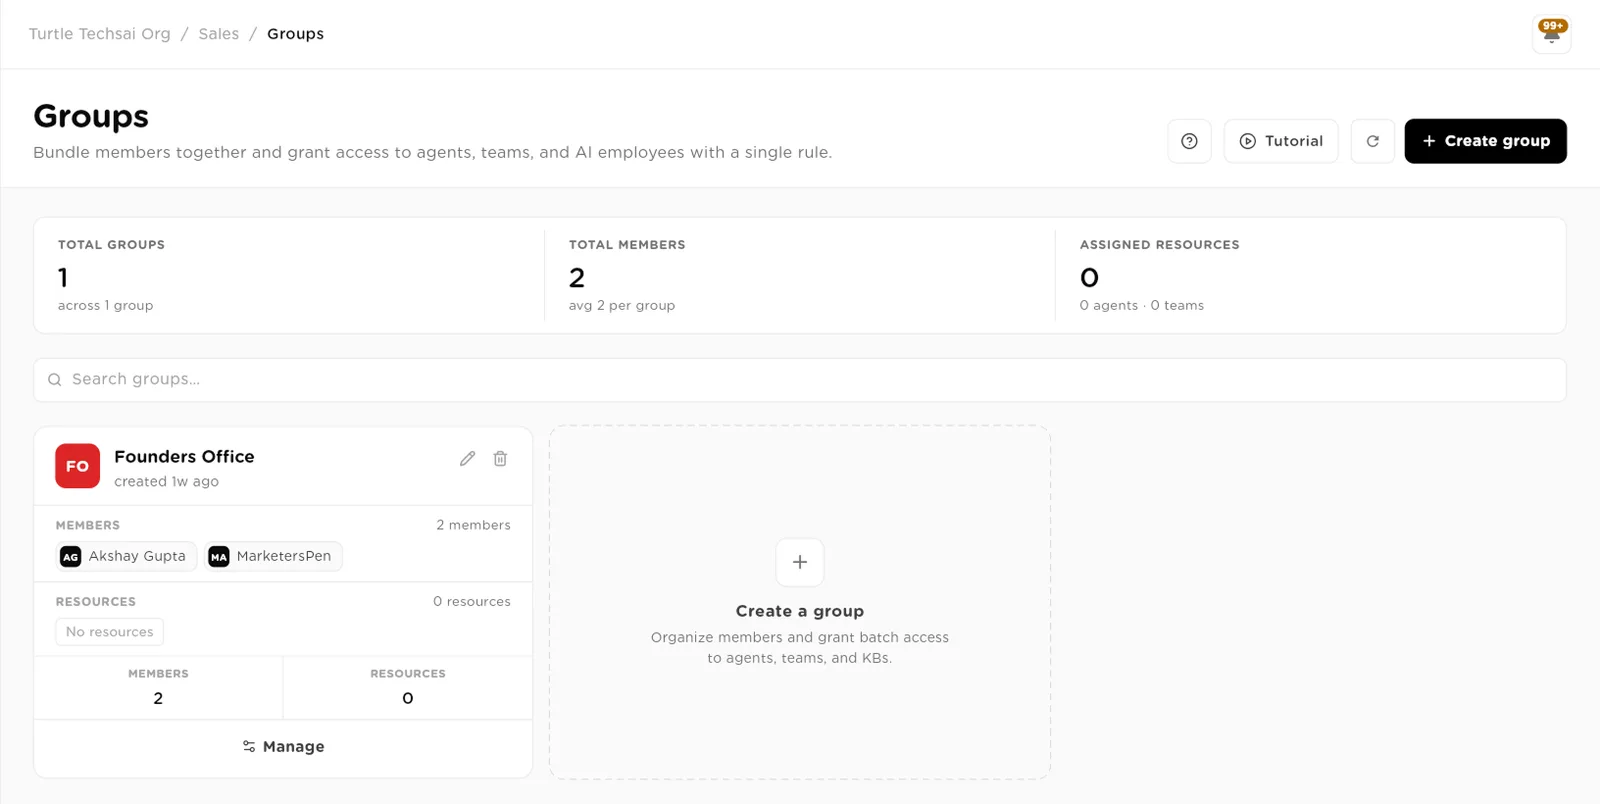
The Groups page: one card per group, with its members, resources and a Manage button.click to enlarge Create a group
Click Create group in the header, or the dashed Create a group card. Enter a Group name, an optional Description of what the group is for, and pick a colour under Color & icon. Click Create group. An empty group is fine to start; you add people and resources next.
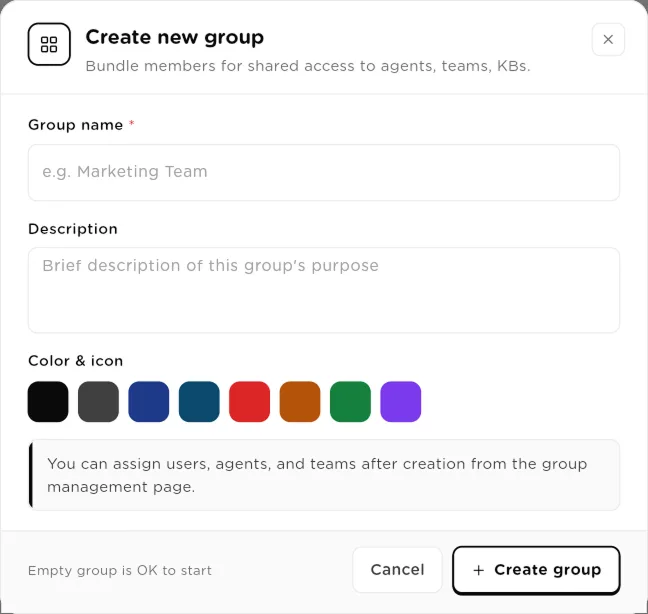
Create new group: a name, a short purpose and a colour. Members and resources come after.click to enlarge Add members
On the group's card, click Manage. The Members tab lists who isAssigned and who is Available to add. Click + next to a person to add them, or the minus button to remove them. Use the search box to find someone in a large organization. Changes save automatically; click Done when you finish.
Share agents with the group
Switch to the Agents tab. Every agent you can share appears underAvailable, with its workspace and a short description. Click + to add it. Agents are shared as Run-only: group members can run the agent and see its results, but cannot change how it is built.
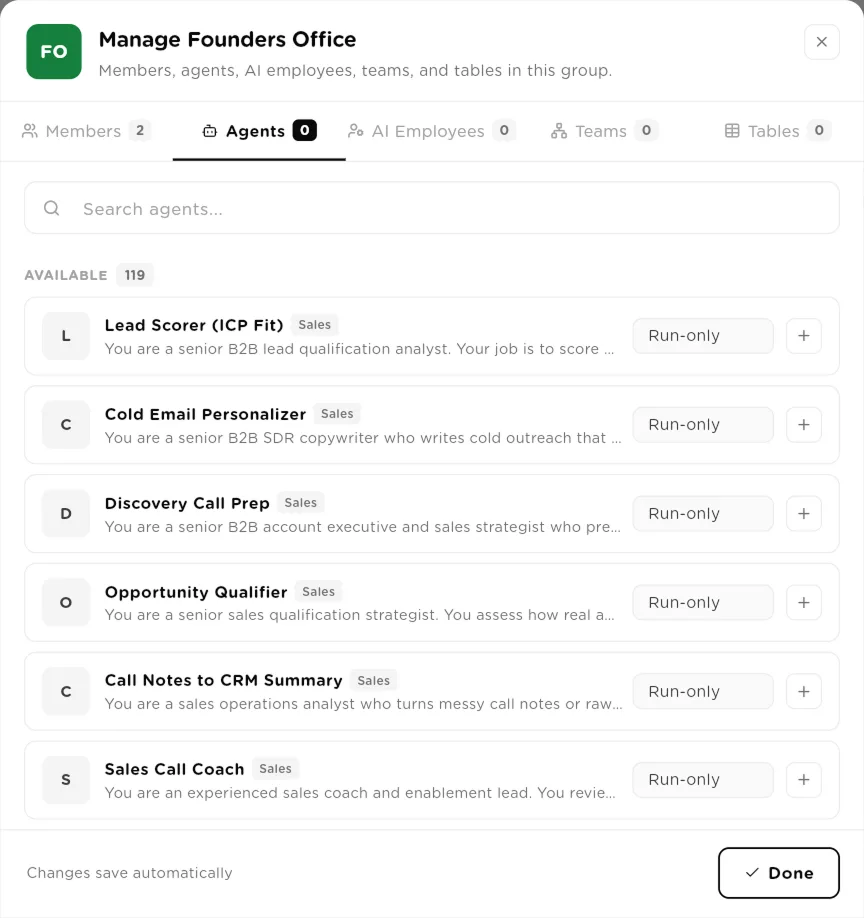
Manage a group: tabs for Members, Agents, AI Employees, Teams and Tables. Changes save automatically.click to enlarge Share AI employees and teams
The AI Employees and Teams tabs work the same way. Add an AI employee so the group can chat with it and hand it work. Add an agentic team so the group can use its chat. Both are shared as Run-only.
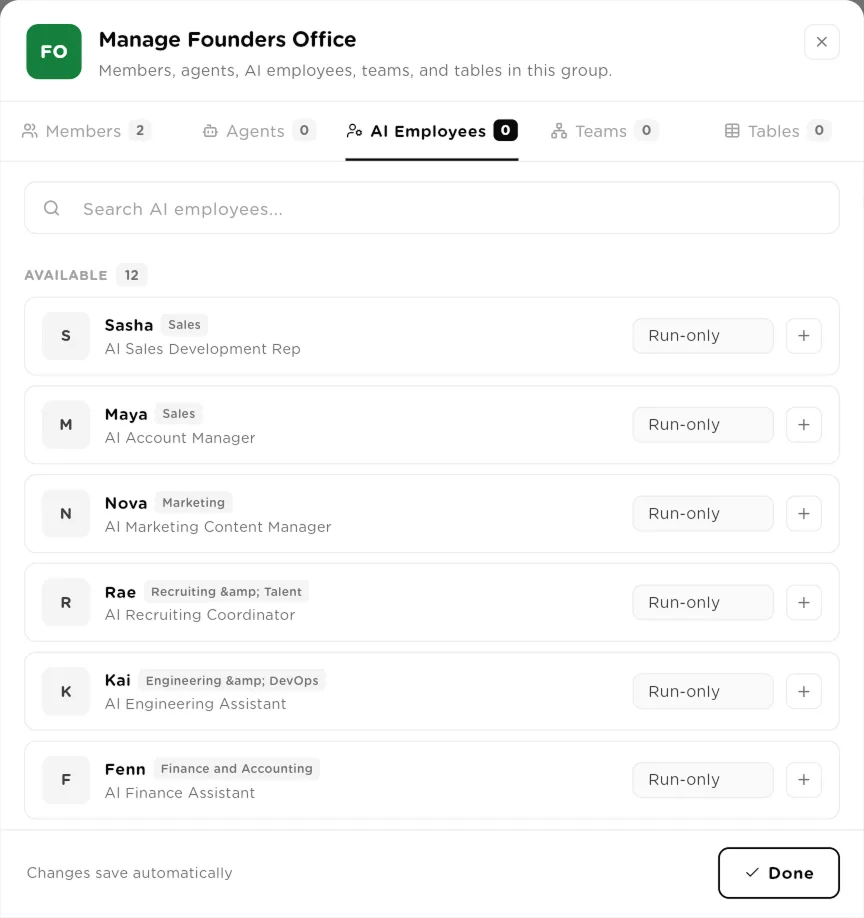
AI Employees tab: each employee shows its department and job, ready to add as Run-only.click to enlarge Share tables with a permission
On the Tables tab, each table shows its column and row counts. Before you click+, choose the permission in the dropdown on that row:
- View only: members can open and read the rows.
- Can use: members can read the rows and also add, edit and delete them.
Neither permission lets a member change the table's columns or automations; that stays with the table's creator and with owners and admins.
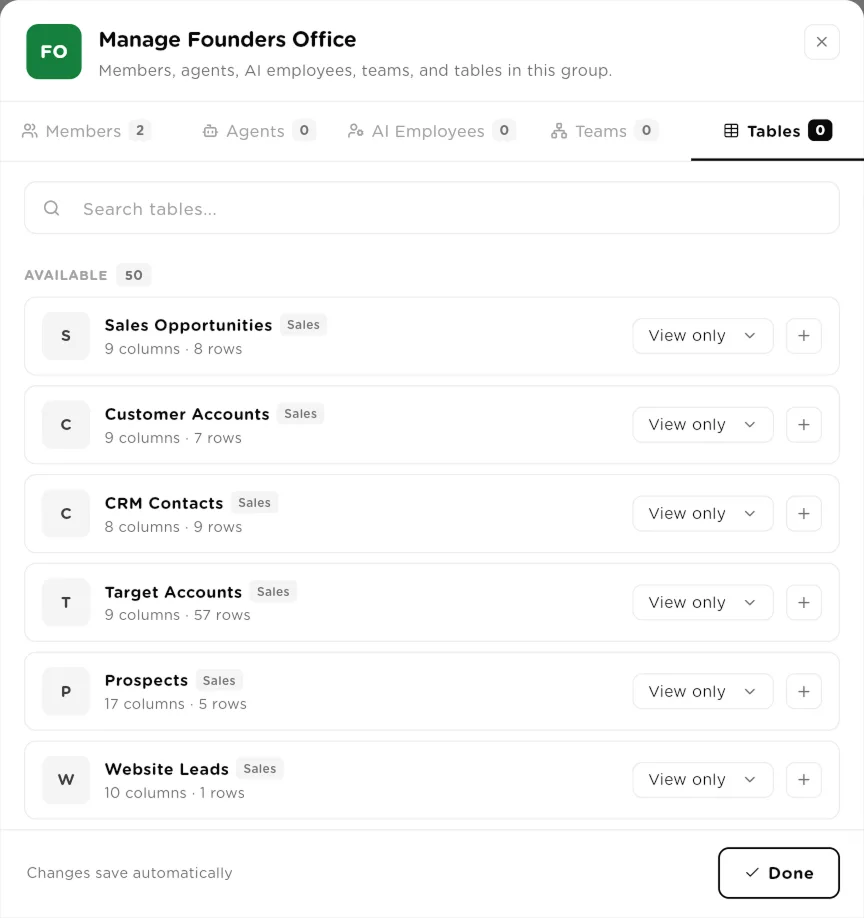
Tables tab: pick View only or Can use for each table, then add it.click to enlarge Share a knowledge base with groups
Knowledge bases are shared from the knowledge base itself, not from the group. When you create a knowledge base, or later from Visibility in its card menu, choose who can read it:
- Everyone in the organization: every member can read it.
- Specific groups: only members of the groups you pick.
- Specific users: only the people you list, plus the creator and owners and admins.
Rename or delete a group
On the group's card, click the pencil to open Rename Group, change theGroup Name and click Save changes. Click the bin to delete the group. Deleting a group removes the access it granted; the people and resources themselves are not deleted.
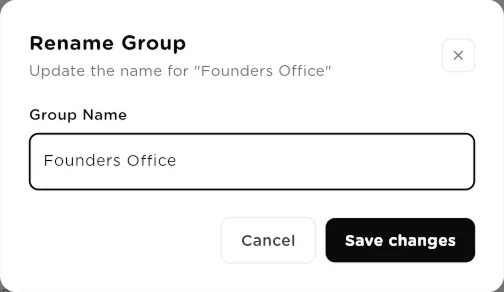
Rename Group: change the name without touching members or resources.click to enlarge
Permission reference
| Permission | Type | What it does |
|---|---|---|
Run-only | agents, teams, employees | Members can find, open and run the resource and see its results. They cannot edit, delete or re-share it. |
View only | tables | Members can read the table's rows. |
Can use | tables | Members can read rows and add, edit and delete them. Columns and automations stay with the creator, owners and admins. |
Specific groups | knowledge bases | Set on the knowledge base's Visibility. Only members of the chosen groups can read and search it. |
Field reference
| Field | Type | What it does |
|---|---|---|
Group name | text | Required. Shown on the group card and wherever you pick a group. |
Description | text | Optional. A short note on the group's purpose. |
Color & icon | choice | One of eight colours for the group's badge. |
Members | people | People in the organization who belong to the group. |
Agents / AI Employees / Teams | resources | Workers the group can run, each shared as Run-only. |
Tables | resources | Tables the group can read (View only) or read and write (Can use). |
Related
- Users & roles: the role each person has before any group access is added.
- Knowledge Bases: visibility settings for documents.
- Tables: how row access and agent access work.
- Organizations & workspaces: where groups and people live.