
Tables
The structured business memory your AI workforce reads and writes: typed columns, AI-enriched columns that fill from agent runs, and row-event triggers that fire workflows, all under least-privilege access.
A Table is the structured data store your AI workforce reads from and writes to. It is a typed grid of rows and columns, scoped to a workspace, that agents can query and update at run time. Where a Knowledge Base holds read-only narrative text for semantic search, a Table holds discrete facts: one row per record, one typed column per attribute.
Two things make a Table more than a spreadsheet. First, a column can be AI-enriched, meaning it is computed by an agent instead of typed by hand. Second, a row event can fire a trigger that runs an agent automatically. A Table is therefore both the memory your workers draw on and the workbench they act on.
When to use a table
Reach for a Table whenever a job needs durable, queryable state that persists between runs and can be shared across agents. It is the difference between a source of truth that outlives any single conversation and output that vanishes when a chat ends. Typical uses:
- Hold a working list of records, such as leads, tickets, documents, or accounts, that agents enrich and update over time.
- Add an AI-enriched column (a summary, score, category, or risk flag) that an agent computes for every row.
- Auto-process each new row on arrival, classifying, routing, or notifying, with a row-created trigger.
- Give an agent a read-only reference table, such as a lookup or catalog, that it can query mid-run.
- Relate one table to another with a foreign key so agents can join across records.
- Import a spreadsheet to seed a table, then export the enriched result back out.
Because every column is typed and every write is attributed, a Table gives your workers a shared record that stays consistent and auditable as many agents act on it.
How a table flows
The point of a Table is that it fills and acts on itself. An agent run writes rows; AI-enriched columns hydrate from that run; a row event fires a trigger; the trigger hands off to the next workflow.
Where tables live
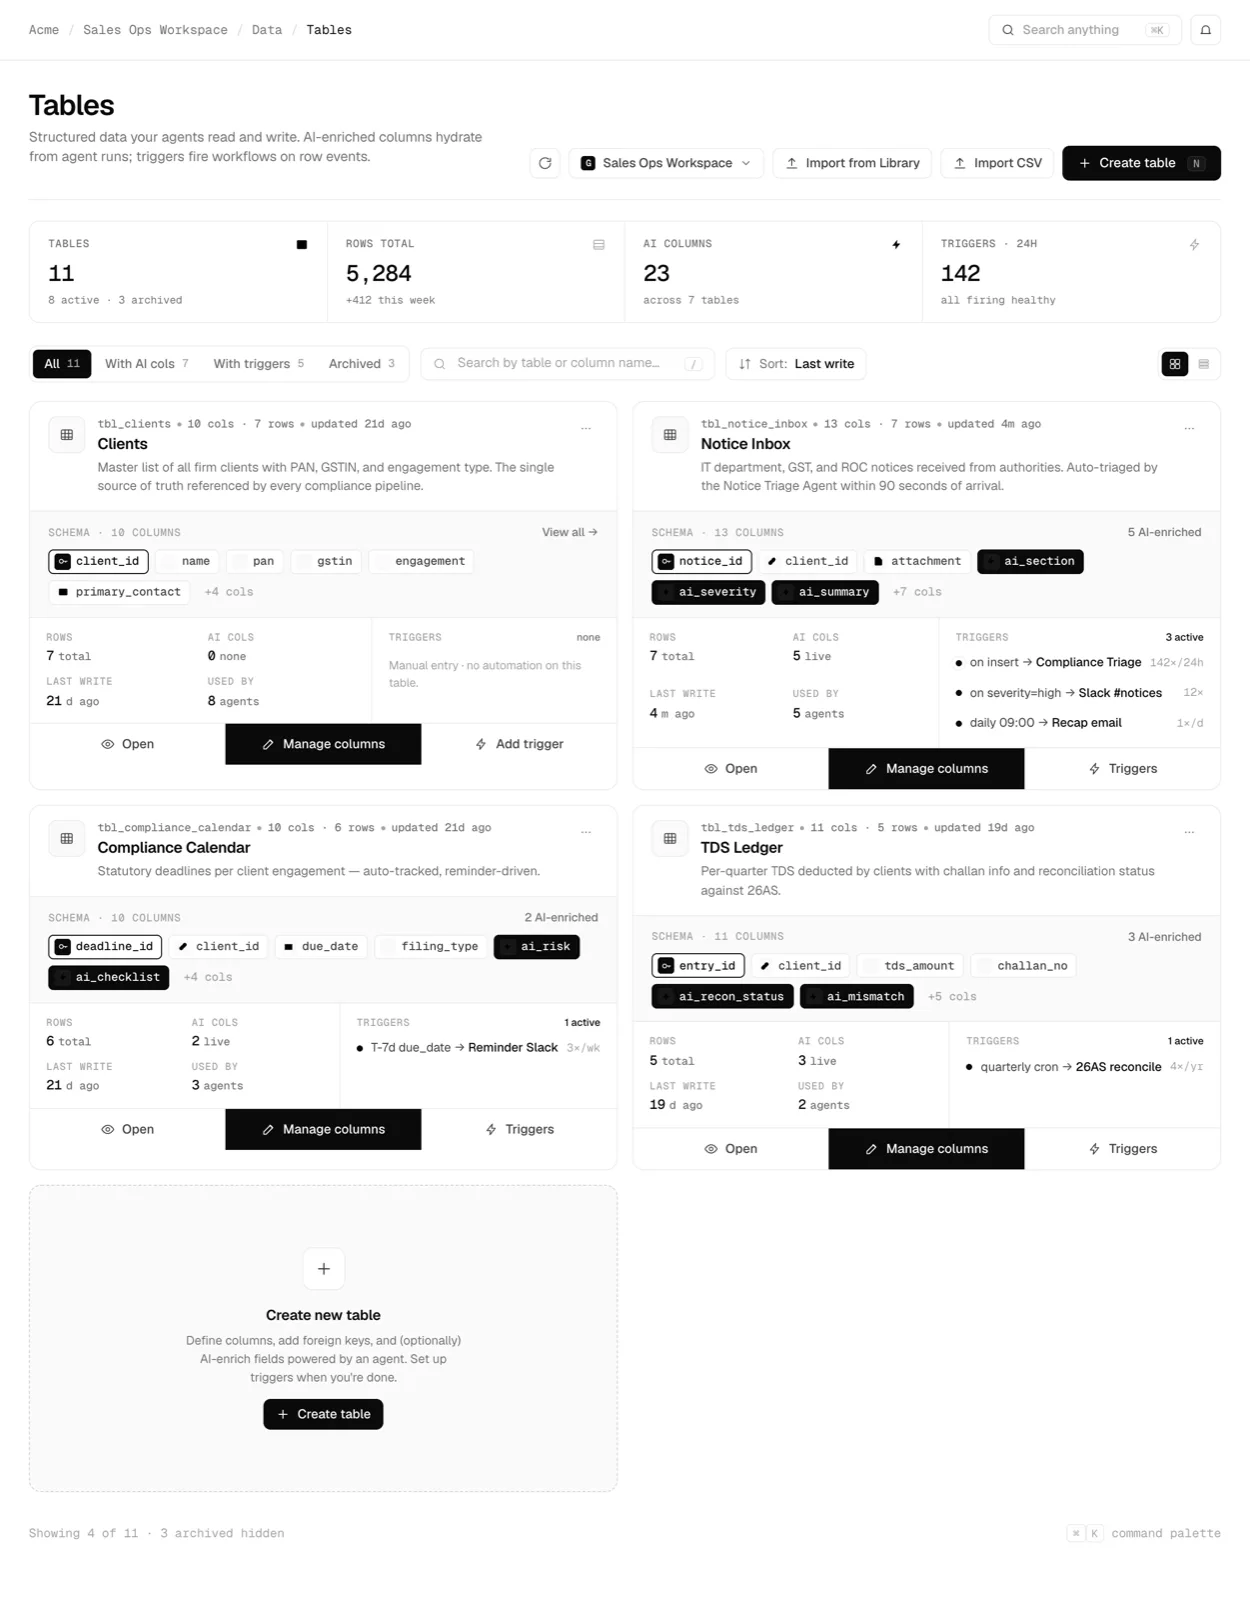
All of your tables appear on the Tables page, the workspace-wide index. Each table is a card showing its schema (column chips, with AI-enriched columns flagged), its metrics (rows, AI columns, last write, and how many agents use it), and its live triggers. From here you can search by table or column name, filter by capability, and open any table into its Table View. The header carries the actions to create a table, import one from the library, or import a CSV.
Step by step
Create a table and add typed columns
From the Tables list, choose Create table. Give the table a name (the display label), an ID (the machine identifier agents reference, usually auto-derived from the name), and an optional description that agents read when deciding whether to query it. Then build the schema one column at a time in the column builder: each column has a name and a type, and selecting a column loads its settings in the config panel.
Make one column the primary key: turn Primary on and the builder locks Required and Unique on automatically, since a primary key can be neither blank nor duplicated. For any other column you can set Unique (no duplicate values) or Required (the row cannot save without a value) to enforce data quality.

Create new table: name the table, then build columns in the list with the type grid and per-column settings.click to enlarge Pick a column type
Selecting a column shows the column type grid. Pick the type that matches what the column holds:
Textfor labels,Numberfor metrics,Datefor timestamps,Selectfor one choice from a fixed set,Foreign Keyto link into another table, and more. Two types add a configuration block: a Foreign Key asks for a referenced table and lookup column; a Select asks for its option list. See the reference below for every type.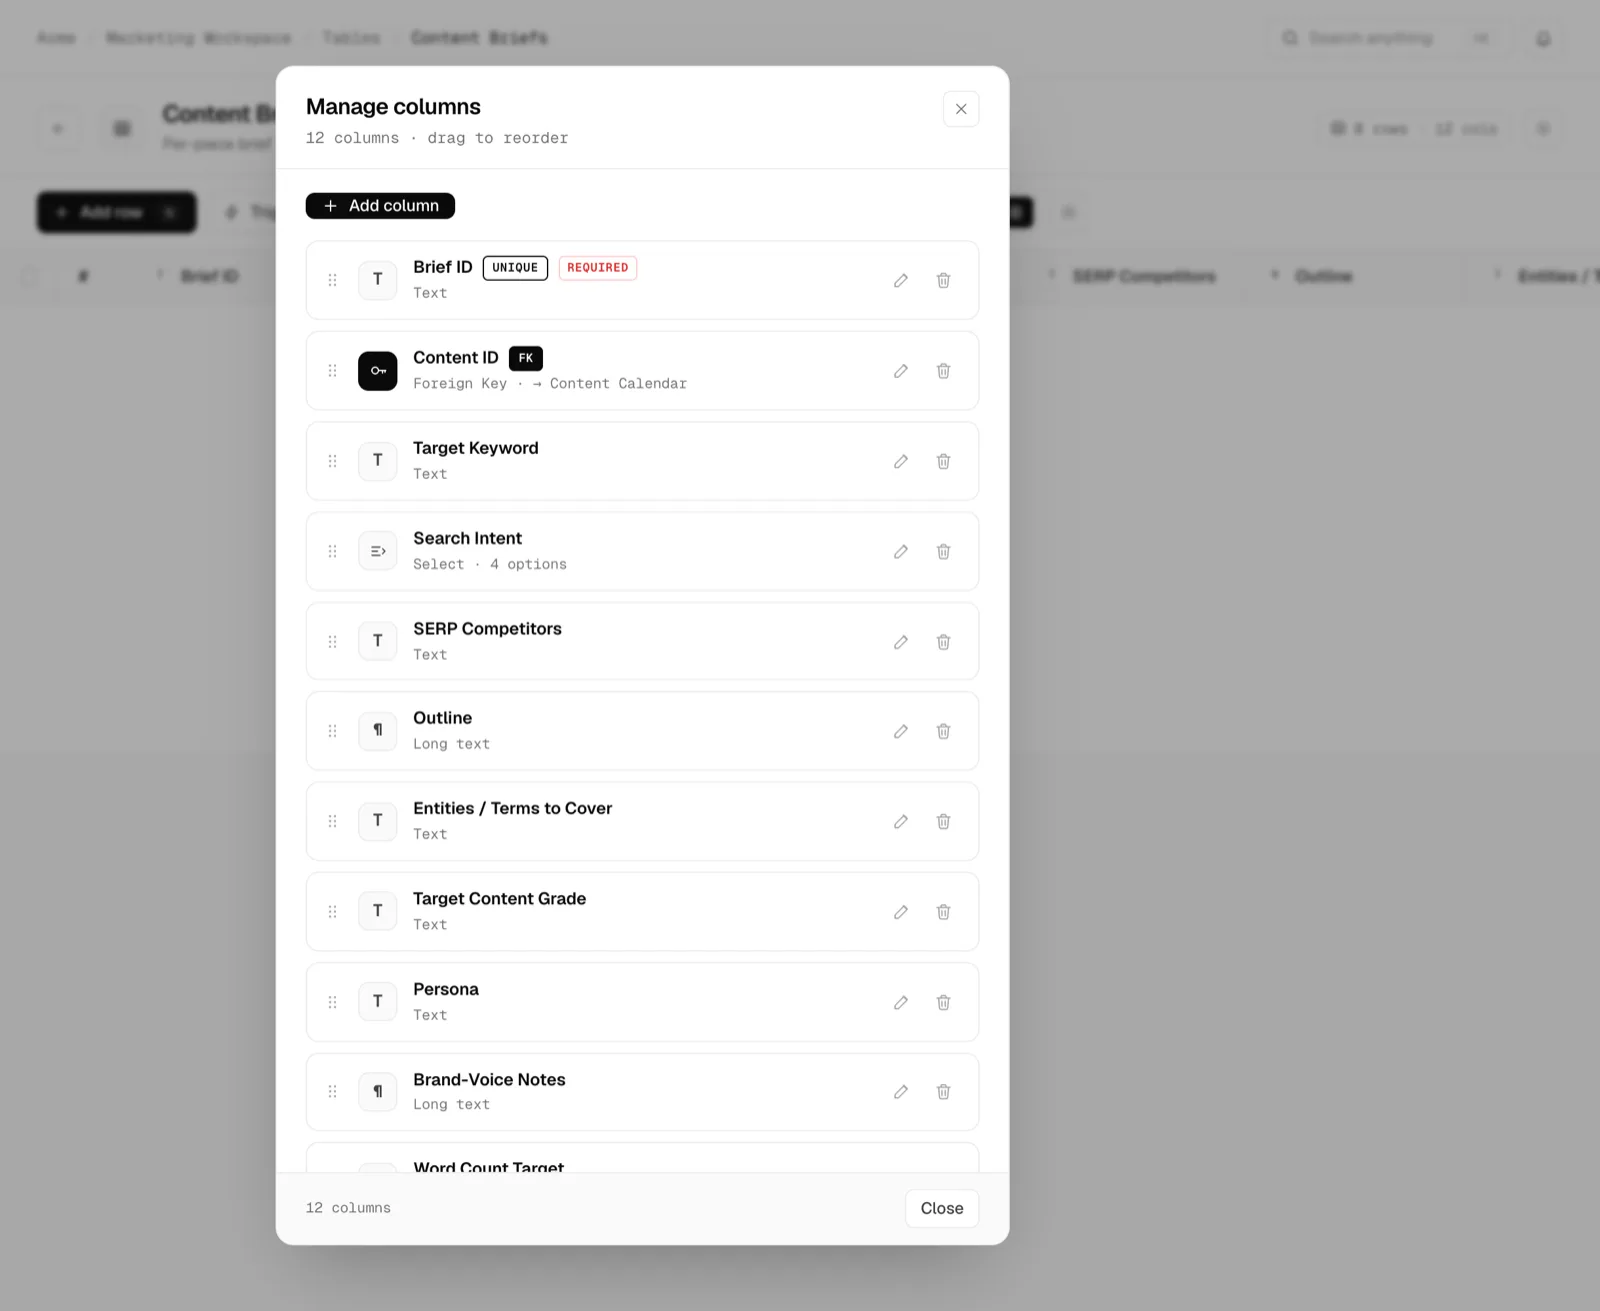
The column type grid: choose from text, number, date, select, foreign key, AI-enriched, and more.click to enlarge Add an AI-enriched column
To have the model derive a field instead of storing it by hand, add a column and set its type to AI Enrich. An AI-enriched column is created empty. You wire the agent that computes it, and its input sources, after the table exists, from Manage columns in the Table View. Once wired, a trigger runs that agent and writes its output into the column (see the triggers step below).
Add, edit, and delete a row
Open a table to reach the Table View, the single-table grid. To add a row, choose Add row in the toolbar (shortcut
N); a blank row editor opens with a field per column. To edit a cell, click the row to slide in the right-hand row drawer, where every field is inline-editable; make your changes and choose Save changes. To delete a row, open its drawer and choose Delete row, or tick one or more rows to raise the selection bar and choose Delete for a bulk removal.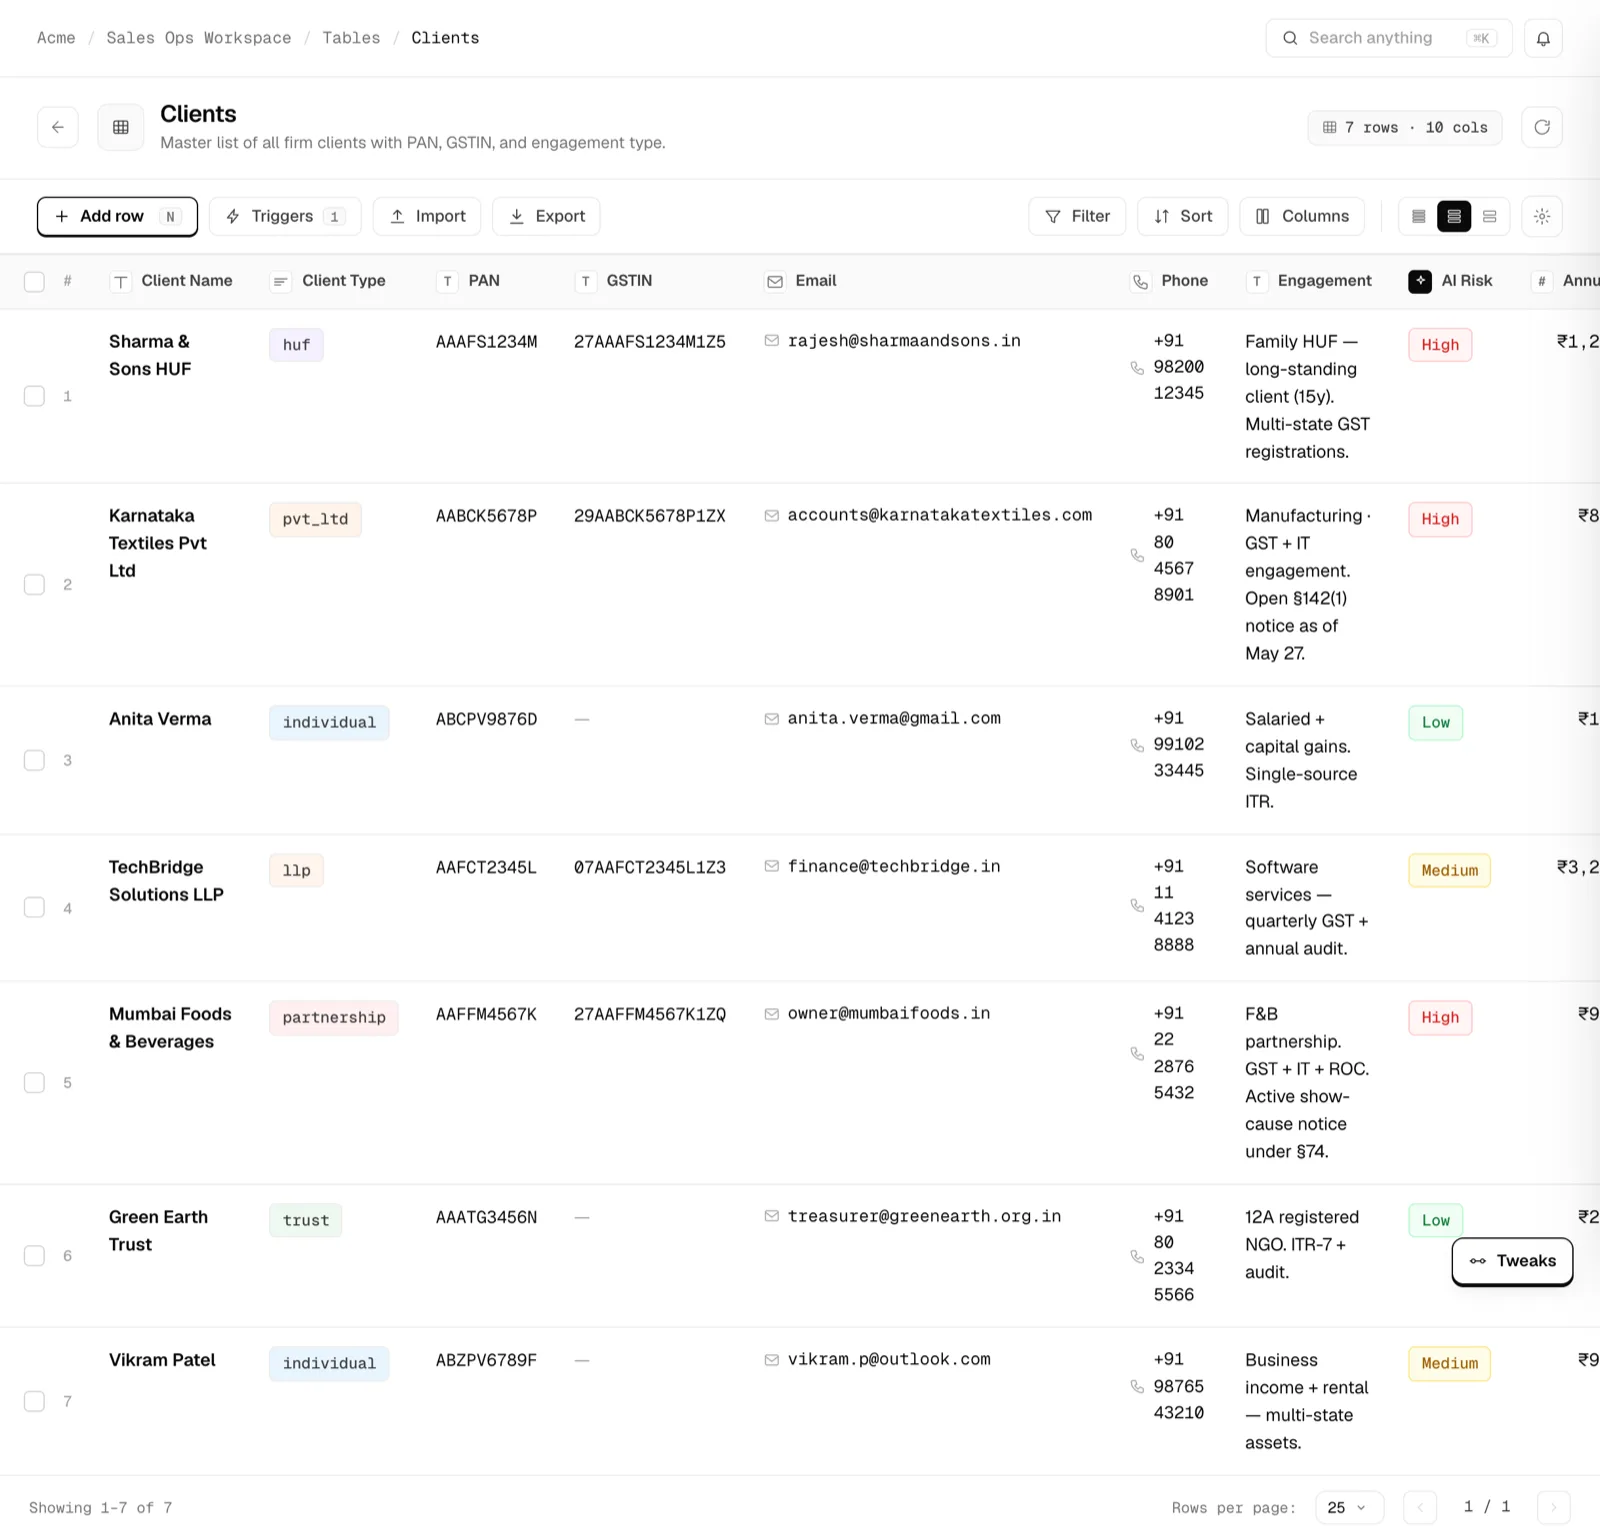
The Table View: the data grid, with typed cells and a color-coded AI-enriched column. Click a row to open its drawer.click to enlarge Filter, sort, and save views
The view actions shape which rows you see without touching the data. Filter builds rows of
column, operator, value(equals, contains, not equals, is empty), combined with AND by default and switchable to OR, applied live. Sort stacks multiple levels, each ascending or descending, with a primary column and tie-breakers. The density picker (Compact, Cozy, Tall) trades rows-on-screen against readability. An export scoped to the current view respects any active filter and sort.Add a row-event trigger
Triggers are the automation heart of a table: when an event occurs on a row, run an agent, feed it mapped input columns, and write its output back to mapped columns. From the toolbar, open Triggers, then Add new trigger. Give it a name, choose the event, choose the agent to run, map inputs (columns into agent inputs) and output (agent output into a column), and optionally add a condition that gates the run.
The event options are:
- When a row is created, on any new insert.
- When a row is updated, when any field on a row changes.
- When a column changes, when a specific column's value changes.
- When a column changes to a specific value, when a column reaches a target value.
- When a row is deleted, when a row is removed.
- On a schedule, when a cron time is reached, with no row event.
Give an agent access and set R/C/U/D permissions
An agent can only touch a table you grant it. You connect a table to an agent on the Agent Editor, on its Tables tab, where each grant carries per-table Read, Create, Update, and Delete permissions. Grant only the operations the agent's job needs: a reporting agent may read only, while an enrichment agent reads and updates. Because access is least-privilege, an agent has no rights to a table until you add it, and every write it makes is attributed and traced back to the run.
Column type reference
Every column has a type that decides what values it accepts and what extra configuration it needs. The table below lists the column types available in the schema builder and how each behaves.
| Column type | Type | What it does |
|---|---|---|
Text | text | Names, IDs, and short strings. Can be marked unique or required. |
Long text | text | A paragraph of free text, for notes and descriptions. |
Number | number | Counts, metrics, and scores. Renders right-aligned. |
Currency | number | A money amount, formatted as currency. |
Date | date | A calendar date, rendered as a mono date. |
Select | choice | One choice from a fixed option set you define in the options block. |
Multi-select | choice | Many choices from a defined set. Uniqueness does not apply. |
Boolean | flag | An on / off flag (shown as Checkbox in the edit modal). Uniqueness does not apply. |
URL | link | A web link. |
Email | An email address, rendered with a mail icon. | |
File | upload | An uploaded document. Uniqueness does not apply. |
Foreign Key | relation | A reference into another table. Configured with a referenced table and a lookup column; uniqueness does not apply since a key naturally repeats. |
AI Enrich | computed | A value the model fills in from an agent run rather than one you type. Starts empty; wired to its agent from Manage columns. Uniqueness does not apply. |
Reshaping a table later
A table's schema is not fixed at creation. Open a table and choose Columns to reach Manage columns, a reorderable list of every column with its type, constraint badges, and inline edit and delete actions. Drag by the grip to reorder, use the pencil to open the Edit Column modal for any change of name, type, or setting, and Add column to append a new one. For an AI-enriched column, this is where you connect the agent that computes it and its input sources.